 Save to Pinterest
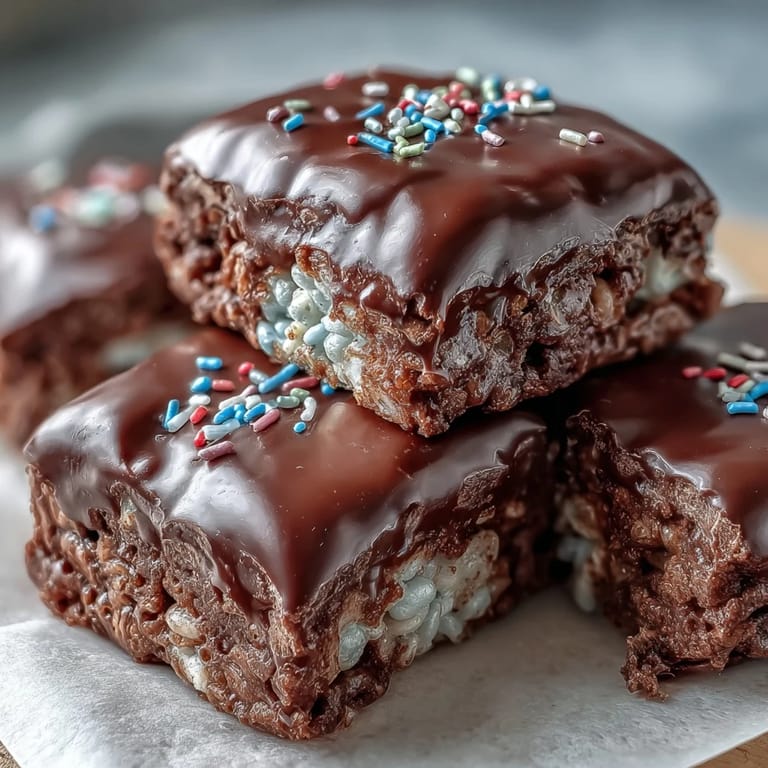
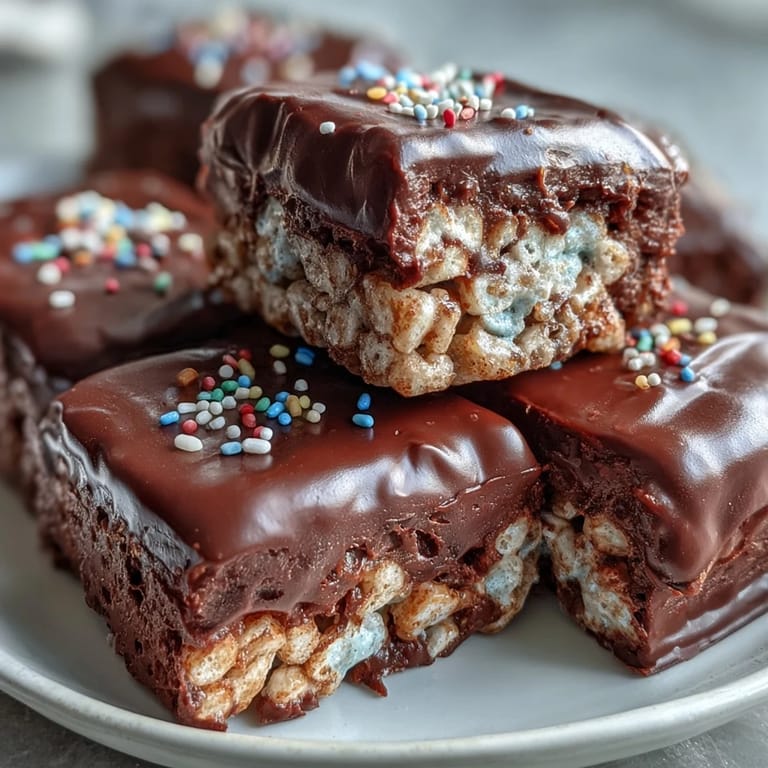
 My sister brought home a tray of these from a bake sale, and I ate three before dinner. The chocolate was still a little soft, and the crunch underneath gave way to this sticky, sweet chew that I couldn't stop thinking about. I asked her for the recipe, and she laughed because she'd bought them, but I figured it out anyway. Now I make them every time someone asks me to bring dessert, and they disappear faster than anything else on the table.
I made these for my nephew's birthday, and he insisted on helping press the cereal into the pan. His hands were covered in butter and marshmallow, and he kept sneaking bites before we even got to the chocolate. When we finally cut them into squares, he picked the corner piece because it had the most chocolate. I still think about the way he grinned with sprinkles stuck to his cheek.
Ingredients
- Unsalted butter: This melts the marshmallows without adding extra salt, and a little extra on your hands keeps the mixture from sticking when you press it down.
- Mini marshmallows: They melt faster and more evenly than the large ones, so you get a smooth, glossy base without any lumps.
- Rice Krispies cereal: The classic crunch that holds everything together, and it soaks up just enough marshmallow to stay light and crispy.
- Fine sea salt: A pinch balances the sweetness and makes the chocolate topping taste richer.
- Semisweet or dark chocolate chips: These melt into a glossy shell that hardens just enough to snap when you bite into it.
- Vegetable oil or coconut oil: A teaspoon keeps the chocolate smooth and pourable, so it spreads easily without seizing up.
- Rainbow sprinkles or chopped nuts: They add color and a little extra texture, and they make the bars look like you spent way more time decorating than you actually did.
Tired of Takeout? 🥡
Get 10 meals you can make faster than delivery arrives. Seriously.
One email. No spam. Unsubscribe anytime.
Instructions
- Prep your pan:
- Grease an 8x8-inch or 9x9-inch square pan with butter, making sure to get into the corners. If you line it with parchment paper, you can lift the whole block out later and cut it on a cutting board without any mess.
- Melt the butter:
- In a large saucepan over low heat, melt the butter slowly, stirring so it doesn't brown or burn. The smell should be warm and nutty, not dark or sharp.
- Melt the marshmallows:
- Add the mini marshmallows to the melted butter and keep stirring until they melt into a smooth, glossy pool. It takes a few minutes, and the mixture will bubble gently as it heats.
- Season the base:
- Remove the pan from the heat and stir in the sea salt if you're using it. The salt dissolves right away and deepens the sweetness without making it taste salty.
- Fold in the cereal:
- Add the Rice Krispies and fold gently with a spatula until every piece is coated in marshmallow. Be careful not to crush the cereal, or you'll lose that airy crunch.
- Press into the pan:
- Transfer the mixture to your prepared pan and press it down evenly with a buttered spatula or your hands. Press firmly so the bars hold together when you cut them, but don't pack it so tight that it gets dense.
- Let it rest:
- Let the cereal layer sit at room temperature for about ten minutes so it cools slightly and firms up. This makes it easier to spread the chocolate without melting the marshmallow underneath.
- Melt the chocolate:
- In a microwave-safe bowl, combine the chocolate chips and oil. Microwave on medium power in thirty-second bursts, stirring after each one, until the chocolate is smooth and glossy.
- Pour the chocolate:
- Pour the melted chocolate over the cooled cereal layer and spread it evenly with an offset spatula or the back of a spoon. Work quickly so the chocolate stays fluid and smooth.
- Add the garnish:
- Immediately sprinkle the top with rainbow sprinkles or chopped nuts while the chocolate is still wet. Press them down gently with your fingertips so they stick.
- Let it set:
- Allow the treats to sit at room temperature for at least an hour, or refrigerate them for twenty to thirty minutes until the chocolate hardens completely. The fridge is faster, but room temperature gives you a softer bite.
- Cut into bars:
- Once the chocolate is firm, lift the block out of the pan using the parchment overhang, or invert it onto a cutting board. Cut into twelve to sixteen bars with a sharp knife, wiping the blade clean between cuts for neat edges.
 Save to Pinterest
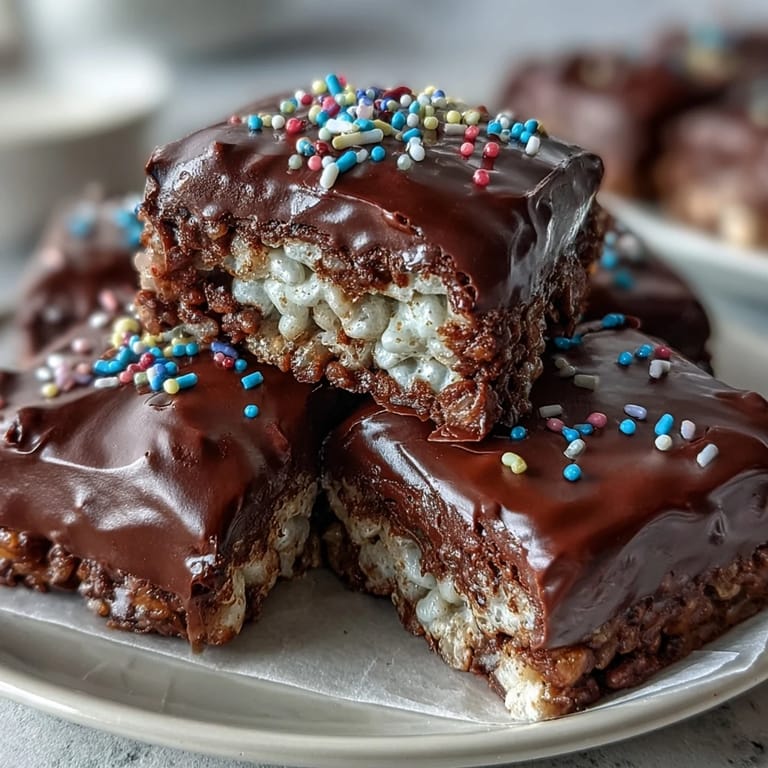
 I once made these for a potluck, and someone asked if I'd bought them from a bakery. I didn't correct them right away because it felt good to let them think I'd done something more complicated. When I finally admitted how simple they were, half the room asked me to walk them through it. Now I think the best compliment a recipe can get is when people assume it's harder than it really is.
How to Store and Keep Them Fresh
I keep these in an airtight container at room temperature, and they stay crispy and fresh for up to three days. If your kitchen is warm or humid, store them in the fridge so the chocolate doesn't soften or bloom. Let them sit out for a few minutes before serving if they've been chilled, so the chocolate isn't too hard to bite through. I've also frozen them in a single layer on a baking sheet, then transferred them to a freezer bag, and they thawed perfectly in about twenty minutes.
Ways to Change It Up
I've stirred half a teaspoon of vanilla extract into the melted marshmallows, and it adds a warm, rounded sweetness that makes the whole thing taste more homemade. If you want a festive look, swap the semisweet chocolate for white chocolate and use pastel sprinkles. I've also pressed crushed pretzels or toffee bits into the chocolate before it sets, and the salty crunch plays beautifully against the sweet cereal. For a grown-up version, I've used dark chocolate and a sprinkle of flaky sea salt, and it turned these into something you'd serve at a dinner party.
What to Serve Them With
These are rich enough to stand on their own, but I've served them on a platter next to fresh berries or sliced fruit, and the tartness cuts through the sweetness perfectly. They're also great alongside a bowl of vanilla ice cream or a cup of strong coffee. If you're packing them for a party, stack them in a clear container so people can see the chocolate and sprinkles, and they'll disappear before anything else on the table.
- Pair them with fresh strawberries or raspberries for a bright, tart contrast.
- Serve them with a scoop of vanilla or salted caramel ice cream for a decadent dessert.
- Pack them in a tin or box tied with ribbon if you're giving them as a gift, and they'll look as good as they taste.
 Save to Pinterest
 These bars remind me that the best recipes don't have to be complicated to feel special. Every time I pull them out of the fridge and cut them into squares, I think about how something so simple can make people so happy.
Recipe FAQs
- → Can I use white chocolate instead of semisweet?
Yes, white chocolate works beautifully and creates a striking visual contrast. White chocolate tends to be softer when set, so refrigerating for at least 30 minutes is recommended. Pastel sprinkles complement white chocolate especially well for seasonal variations.
- → How do I prevent the marshmallows from sticking to the saucepan?
Melt the butter completely first over low heat before adding marshmallows. Stir constantly and keep the heat low to prevent scorching. If needed, coat your saucepan lightly with butter beforehand. The mixture should slide out easily when properly melted.
- → Why add oil to the chocolate topping?
The vegetable or coconut oil helps the chocolate set with a glossy finish and makes it easier to cut clean bars. Without oil, the chocolate can be too hard and crack when cutting. One teaspoon per 1½ cups of chips creates the perfect consistency.
- → How should I store these treats?
Keep in an airtight container at room temperature for up to 3 days. In humid or warm weather, refrigerate to prevent the chocolate from softening. They'll last up to a week in the refrigerator. Separate layers with parchment paper to prevent sticking.
- → Can I make these ahead for a party?
Absolutely. These actually improve after sitting overnight as the flavors meld. Make them up to 2 days in advance, store covered at room temperature, and add sprinkles just before serving for maximum freshness and crunch. For longer storage, wrap individually and freeze.
- → My chocolate seized while melting—what went wrong?
Chocolate seizes when exposed to moisture or overheated. Always use a dry bowl and avoid getting water in the chocolate. Microwave in 30-second intervals at medium power, stirring well between each. If seizing occurs, stir in a teaspoon of oil to smooth it out.