 Save to Pinterest
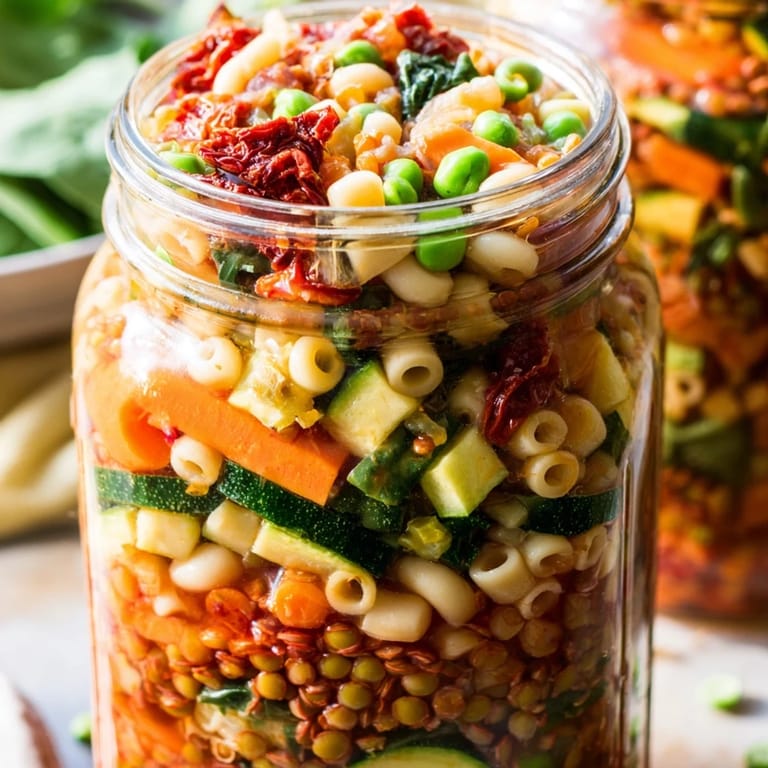
 My coworker Sarah showed up one Monday with four identical mason jars lined up in her lunch bag, each one filled with what looked like a tiny garden. She unscrewed the lid, added hot water from the office kettle, and ten minutes later had the most fragrant bowl of minestrone soup while the rest of us microwaved sad desk lunches. I asked her the secret, and she laughed—it was all about the layering. That conversation changed how I think about meal prep, turning it from a chore into something that actually feels clever and intentional.
I made a batch of these on a rainy Sunday and gave two jars to my neighbor who'd just had surgery. Watching her face light up when she realized she could eat real food without any effort reminded me that the best recipes aren't always about impressing people—sometimes they're just about showing up with something warm when someone needs it most.
Ingredients
- Small pasta (ditalini, elbow macaroni, or mini shells): Use 1/3 cup (45 g) per jar; smaller shapes cook faster and feel less heavy than larger pasta when rehydrated.
- Dried red lentils: 2 tbsp (20 g) per jar, and they'll soften beautifully without turning to mush, adding gentle earthiness and protein.
- Canned cannellini beans: 2 tbsp (20 g) per jar, rinsed well so the soup stays clear rather than cloudy.
- Zucchini, diced: 1/3 cup (50 g) per jar; its mild flavor and tender texture balance the stronger vegetables without competing for attention.
- Carrots, diced: 1/3 cup (50 g) per jar, and they add natural sweetness that deepens when the hot water hits them.
- Celery, diced: 1/3 cup (50 g) per jar; the aromatic backbone that makes people ask what smells so good.
- Frozen green peas: 1/4 cup (30 g) per jar, and they don't need thawing first, which keeps the whole process streamlined.
- Baby spinach, chopped: 1/4 cup (30 g) per jar, added near the top so it stays vibrant green and tender rather than dark and tired.
- Sun-dried tomatoes, chopped: 2 tbsp (30 g) per jar of the oil-packed kind, drained; they deliver concentrated tomato flavor that regular tomatoes can't match.
- Tomato paste: 1 tbsp (15 g) per jar, the umami secret that makes people think you spent hours on this.
- Dried Italian herbs: 1 tsp per jar, measured carefully because dried herbs punch harder than fresh ones.
- Garlic powder: 1/2 tsp per jar, keeping the soup smooth and cohesive without raw garlic bits.
- Chili flakes (optional): 1/4 tsp per jar if you like warmth that sneaks up on you.
- Salt: 1/2 tsp per jar, though you'll taste-test when the water goes in anyway.
- Black pepper: 1/4 tsp per jar, ground fresh if your grinder's handy.
- Vegetable bouillon cube, crumbled: 1 per jar, the insurance policy that ensures the broth tastes intentional rather than like hot water with vegetables in it.
- Boiling water: 2 cups (500 ml) per jar when you're ready to eat, the catalyst that brings everything to life.
- Grated Parmesan cheese (optional): A handful scattered on top adds salty richness, or skip it entirely for a fully vegan meal.
Tired of Takeout? 🥡
Get 10 meals you can make faster than delivery arrives. Seriously.
One email. No spam. Unsubscribe anytime.
Instructions
- Gather your jars and prep your ingredients:
- Pull out four quart-size mason jars and set them on a clean surface; having them lined up feels like you're conducting an orchestra. Dice all your vegetables into pieces roughly the size of a pea, and measure out your dried ingredients so you're not fumbling mid-layer.
- Build the foundation with pasta and legumes:
- Pour the small pasta into the bottom of each jar first—it stays put because it's dry and provides structure for everything above. Follow with the lentils and beans, pressing down gently so they nestle into any gaps without crushing.
- Add your vegetable layers with intention:
- Layer the carrots and celery next, the harder vegetables that need the most rehydration time. Then zucchini, which is softer and will cook faster, followed by the peas and spinach on top where they'll stay bright and tender.
- Crown with flavor and seasoning:
- Sprinkle the sun-dried tomatoes, then add a small dollop of tomato paste, pressing it against the side of the jar so it disperses through the water later. Top with your herbs, garlic powder, chili flakes, salt, pepper, and crumbled bouillon cube in whatever order feels natural.
- Seal and store strategically:
- Screw the lids on tightly and refrigerate for up to four days, knowing each jar is a self-contained meal waiting to happen. The vegetables won't break down or get soggy because they're dry and compact, not drowning in liquid yet.
- Transform with boiling water when hunger strikes:
- Remove a jar from the fridge and add 2 cups of boiling water right into it, stirring well to distribute the tomato paste and seasonings throughout. You can screw the lid back on and shake it gently if you want, which honestly feels satisfying and speeds up the mixing.
- Wait for the magic to happen:
- Let it sit for 10-15 minutes, watching as the pasta softens and the vegetables release their colors into the broth; the waiting feels like watching time-lapse photography. If you're impatient, microwave the open jar for 3-4 minutes, stirring halfway, and you'll get the same result faster.
- Taste, adjust, and elevate:
- Stir once more, taste for salt and seasoning, and add a pinch more if needed because bouillon can be unpredictable depending on the brand. Top with Parmesan if you have it, or a drizzle of olive oil and fresh basil if you're feeling fancy.
 Save to Pinterest
 My daughter once packed one of these jars for a school field trip and called me at lunch to say it was the only warm food anyone had, and suddenly she was the kid with the enviable meal instead of the one whose mom forgot to pack enough snacks. That small moment of her confidence mattered more to me than any compliment on the actual soup.
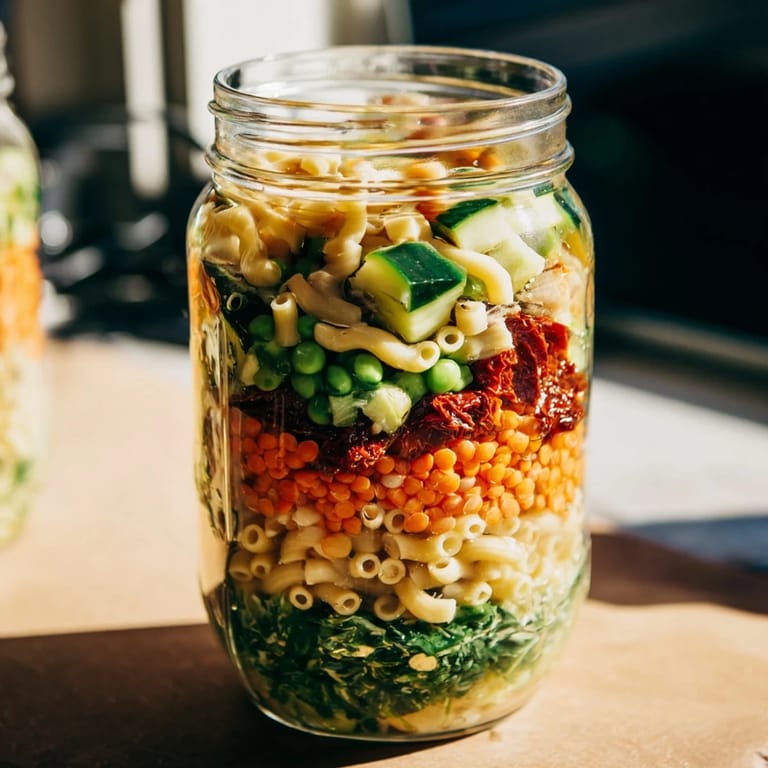
Why Layering in Jars Actually Works
When you pack ingredients dry in a jar, you're essentially creating a time-release system where each component rehydrates at exactly the pace it needs. The pasta sits at the bottom surrounded by moisture and gradually softens, the beans and lentils absorb water steadily, and the delicate vegetables on top stay firm until the very end. It's not fancy chemistry—it's just physics and patience working in your favor, which means you get perfect texture distribution every single time rather than that mushy-or-crunchy gamble you get with regular meal-prep containers.
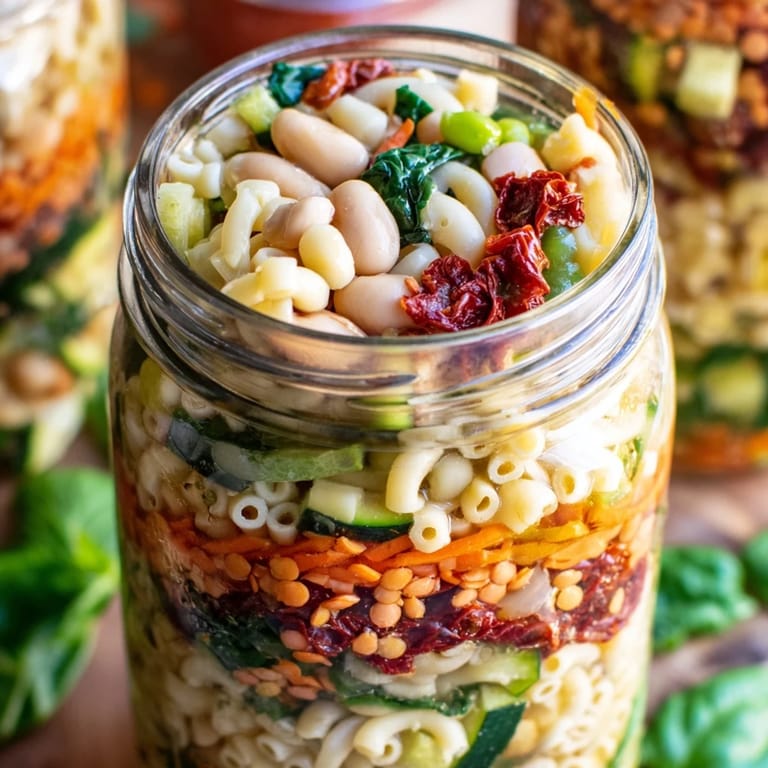
Storage and Make-Ahead Flexibility
These jars live happily in your refrigerator for up to four days, which means you can make them on Sunday and eat like you meal-prepped for almost a week. The sealed jars keep everything fresh because there's no air exposure, and honestly, knowing exactly what's inside four ready-to-go lunch containers feels like a small personal victory on a Wednesday morning. If you find yourself with a jar left over, the dry ingredients inside stay shelf-stable for months in the pantry, so nothing ever goes to waste.
Customization and Seasonal Swaps
The beauty of this format is that you can build jars around whatever vegetables are calling to you—summer corn and cherry tomatoes, fall butternut squash and kale, spring asparagus and fresh herbs. Think of the ingredient list as a template rather than a rulebook, adjusting quantities and varieties based on what's in your crisper drawer or what your body is craving. You might even get creative with different beans, swap barley for pasta, or add dried mushrooms for earthiness, knowing that as long as you keep the dry-first-delicate-last structure intact, your jar will come together beautifully.
- Keep your bouillon cubes on hand because they're the secret ingredient that transforms vegetable water into actual broth.
- Label your jars with a piece of tape and a marker if you're making multiple batches with different vegetables so you don't accidentally grab the wrong one.
- Taste your finished soup before eating—every bouillon brand is slightly different, so you might need to adjust salt or add a squeeze of lemon juice for brightness.
 Save to Pinterest
 What started as copying Sarah's lunch-jar hack has become the way I show care—whether that's for busy mornings, friends going through tough times, or just myself on days when I need something warm and real but don't have the energy to cook. These jars sit in my fridge like tiny promises that good food is always just one kettle away.
Recipe FAQs
- → How long can these jars be stored in the refrigerator?
Sealed jars can be stored in the refrigerator for up to 4 days. The layered ingredients remain fresh and ready to prepare whenever you need a quick meal.
- → Can I customize the vegetables in this soup?
Absolutely. Feel free to swap in your favorite vegetables like bell peppers, mushrooms, or broccoli. Adjust water and seasonings to maintain the desired flavor balance based on your vegetable choices.
- → What's the best way to heat the jar contents?
Add 2 cups of boiling water directly to the jar and let it sit for 10-15 minutes while the pasta cooks. Alternatively, pour contents into a microwave-safe bowl and microwave for 3-4 minutes, stirring halfway through for even heating.
- → Is this suitable for vegan diets?
Yes. The base preparation is vegan-friendly. Simply omit the Parmesan cheese topping. All other ingredients, including the bouillon cube and sun-dried tomatoes, are plant-based when selected carefully.
- → Can I make this gluten-free?
Definitely. Replace the regular pasta with gluten-free pasta in the same quantity. Verify that your bouillon cube is also gluten-free, as some varieties may contain hidden gluten.
- → How much preparation time does this require?
Assembly takes approximately 15 minutes. Once layered and sealed, jars can be refrigerated immediately. Total cooking time after adding water is just 20 minutes, making this ideal for busy meal planning.